Here’s what you need to know if you find ticks inside your home
I like to think of myself as someone who appreciates all creatures, big and small. Even the most commonly feared animals, like spiders and snakes, don’t bother me to the point where I feel compelled to avoid them. I maintain a level of understanding and tolerance toward them.
However, I draw the line at ticks.
It’s a little embarrassing to admit, but I wouldn’t lose a second of sleep if ticks disappeared from the Earth for good. While their mere presence is enough to send shivers down most people’s spines, the truth is that ticks pose more than just an inconvenience – they can be dangerous.
Ticks are known to transmit serious diseases such as Lyme disease and Rocky Mountain spotted fever, which makes them more than just a nuisance. Depending on where you live, the season, and whether you have pets, encountering ticks inside your home might be a more common problem than you think.
If you do find yourself in the unfortunate situation of discovering ticks indoors, it’s important to handle the situation properly. Here’s what you need to know:
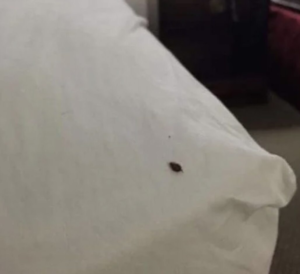
Step 1: Identify and Isolate the Tick
The first step in managing ticks indoors is to identify the type of tick. Common types include black-legged ticks, dog ticks, and brown dog ticks. Knowing which type you’re dealing with can help you understand the potential risks involved. If the tick is found in a specific area, make sure to keep children and pets away until you can deal with it properly.
Step 2: Protect Yourself
Ticks are notorious for latching onto your skin, so it’s crucial to protect yourself when handling them. Wearing gloves and long sleeves is a good idea to minimize skin exposure. It’s best to avoid touching the tick directly with your bare hands.
Step 3: Clean Thoroughly
Once you’ve dealt with the tick, take extra care to clean any surfaces it may have come into contact with. Wash any clothing, bedding, or other fabrics that might have been exposed to the tick in hot water to kill any remaining pests. Vacuum the area thoroughly, focusing on corners, cracks, and crevices where ticks might be hiding.
Step 4: Proper Tick Removal
To remove a tick, use a pair of fine-tipped tweezers. Grab the tick as close to the skin’s surface as possible to avoid leaving parts of it behind. Gently pull straight upward, avoiding any twisting or jerking that could cause the tick’s head to break off and remain in the skin. After removing the tick, clean the bite area with alcohol or soap and water to disinfect the wound.
Step 5: Dispose of the Tick
Once you’ve removed the tick, it’s important to dispose of it properly. You can place it in a small container with rubbing alcohol to kill it, or simply flush it down the toilet.
Step 6: Monitor for Symptoms
Even after removing a tick, it’s essential to keep an eye on the bite site for any signs of infection or illness. Symptoms like redness, swelling, or a rash could indicate an infection. If you experience flu-like symptoms, fatigue, or other issues, it’s important to seek medical attention promptly.
By following these steps, you can minimize the risks ticks pose inside your home and reduce the chances of contracting a tick-borne illness. Remember to stay vigilant, especially if you live in an area where ticks are more prevalent, and take steps to prevent them from entering your home in the first place.